
Yes, the internet is pretty cool, but nothing compares to watching that thin sheet of plastic as it curls up and into it's self, then reopens, like a flower to the sun, a 1/4 of the size it started off as. How the heck do they do that??
With inkjet shrink plastic, the important thing to remember and to experiment with is the transparency or lightness of your artwork. I am on Adobe Illustrator so I set the transparency to around 55%. When the plastic shrinks, the color gets way darker so play around with your settings and know that each printer will vary, so do some tests to see what works well for your printer.
 |
| At 55%, it looks really light, but when cooked gets bright and saturated. |
Now you just cut out your designs and preheat the toaster over to 375. On most shrink plastic directions it says to punch a hole before cooking. I actually drill my holes with a drill press after cooking, but if you punch before hand keep in mind that the hole will shrink a lot.
With all shrink plastic there is an issue of it not being water proof. This is really a problem I think with jewelry, so it's important to me since I am selling my work, that it be H2O proof. If you're like me, you really try to avoid spray paints, so I tried many different clear coat products to figure out the best solution for water proofing and here's what I found out...
 |
| NONE OF THESE PRODUCTS WORKED!! |
I had high hopes, especially for the Diamond Glaze, but forget it! The DG made the ink run and it got all crackly. The brush on polyurethane made the colors run, and got all streaky from brush strokes. The 3D Crystal Lacquer left a bunch of small bubbles.
 | ||
| Totally gross! |
So, this meant that yes, I am using a spray paint clear acrylic, and it is working really well. I have wood sticks and I stick the pieces on with Handy-Tak, (love Handy-Tak by the way!!) then I head outside. Every time I start shaking the can I hear a window slam shut from the house next door, and this mean girl gives me the evil eye...
 |
| Shrunk pieces, stuck on with Handy-Tak, and an extra blob of Handy-Tak for reference. |
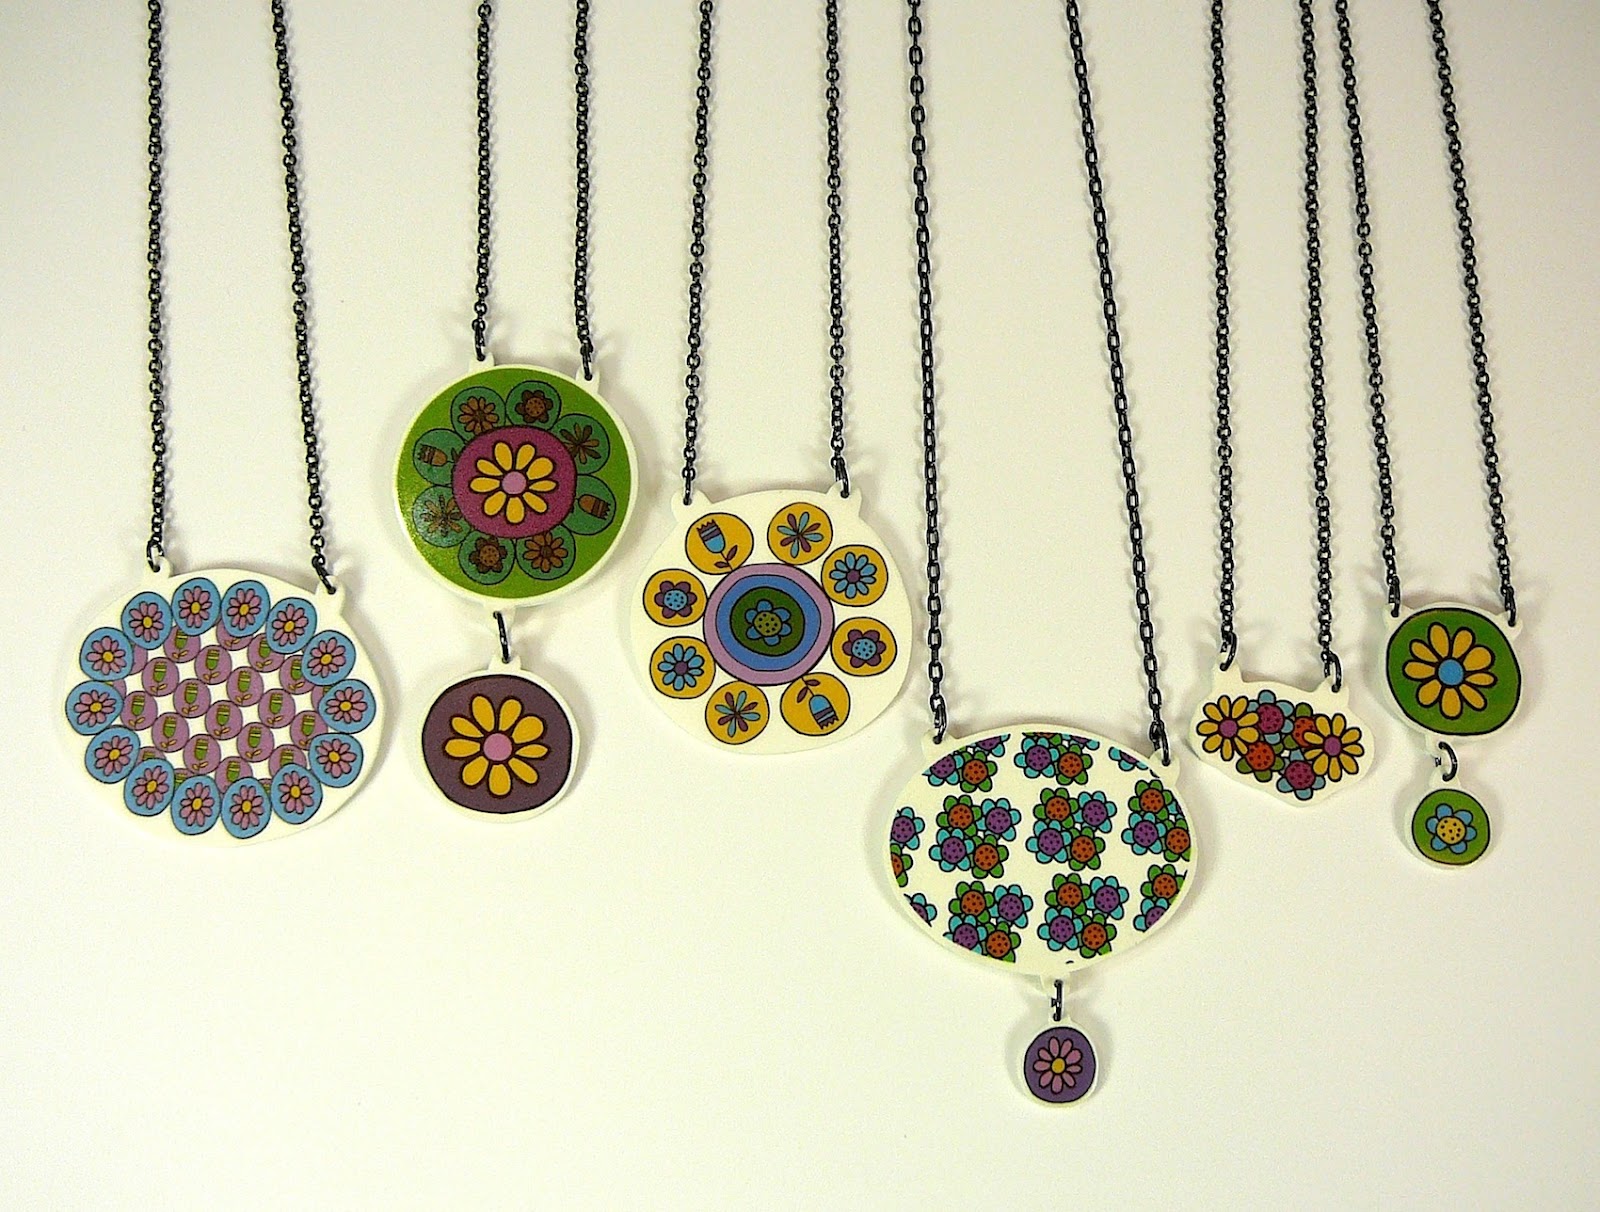
Over the past few years, Shrinky Dinks, or shrink plastic has been gaining popularity with artist and craftsters. All over Etsy you will find amazing jewelry made out of shrink plastic. At the Renegade Craft Fair, the busiest booth in the house was an artist who does incredible jewelry using vintage images, anatomical drawings, cool circus imagery, animals, patterns, all from shrink plastic. As a budding surface designer, I am always interested in materials and processes that will allow me to apply my Illustrator patterns to objects, products and tchotchkes, so finding these inkjet sheets has been an amazing addition to my already over flowing supply of crafting materials..
Shrink plastic for ink jet printers comes in white and clear. Shrinky Dinks is a brand name and that brand comes in different colors such as yellow and purple but those cool colors are not made for ink jet printers. I have only been using white shrink plastic and I bought it on line at a site called PrintOnIt.com It is called Bake 'N Shrink.
No matter how many times I watch my goods bake 'n shrink, I am always amazed at the process.
Wonderful post as usual!
ReplyDeleteThanks Anonymous for stopping by!
ReplyDeleteNice blog. Great information. Thanks for sharing!!!
ReplyDelete