
I
recently decided that copper is the new silver. To prove my point, here is a quick tutorial on how to make
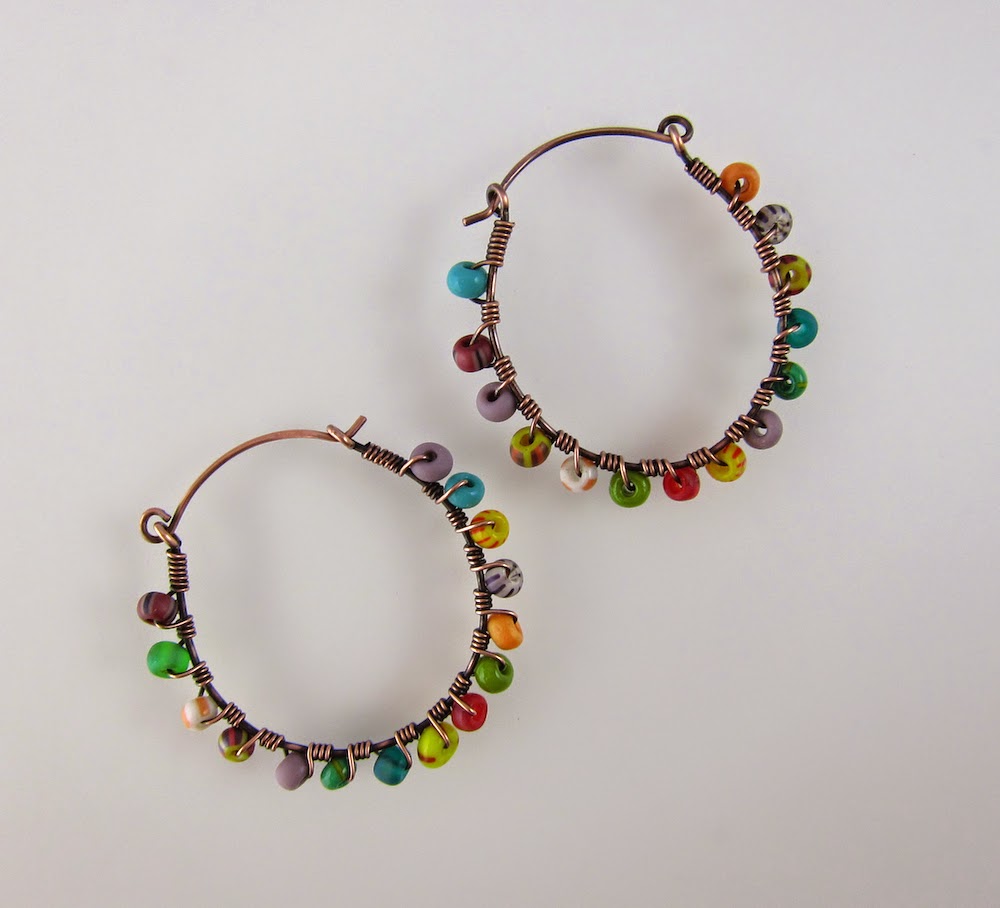
basic copper bead wrapped hoops, and they are so cute, you won’t miss the
silver at all. This is a common technique, but one that looks way more
complicated than it is. I'm sure you have seen bead wrapped earrings all
over Pinterest, and like me, always thought they look pretty involved to
make. I am here to let you know, they are easy peasy...
I
will walk you through the basic hoop like the ones below, then you should be able to come up with
cool variations on your own. You can also study the other variations I
came up with, and I allow you to copy them... :)
Of
course these would be incredible in silver, but copper is great as well, for
many reasons. Copper is way more accessible than silver, you can get it at
hardware stores, rather than specialty jewelry supply stores. Copper is very
malleable, so if you don't have access to a torch for annealing,
annealing is not necessary with this technique. And of course, copper is super
inexpensive compared to silver, although, the costs of all metals are rising.
And copper really is beautiful, especially when it has been placed in a patina
bath to darken and antique it.
Tools
and Materials:
20
gauge copper wire,
24 gauge copper wire
ring mandrel or wood dowel, 1"
seed beads in a variety of sizes and colors
pliers: round nose, needle nose, flush cutters
needle files (optional)
Liver of Sulfur patina
pumice powder, or fine steel wool
ruler
24 gauge copper wire
ring mandrel or wood dowel, 1"
seed beads in a variety of sizes and colors
pliers: round nose, needle nose, flush cutters
needle files (optional)
Liver of Sulfur patina
pumice powder, or fine steel wool
ruler
Sharpie
Steps:
Cut
2 pieces of the 20 gauge copper 3.5" long. If you have files, file the
ends flush. If you don't have files, make sure to have used the flush side of
your cutters.
On your round nose pliers, mark a line with a Sharpie where you will be bending
your loops so you have consistency with your loop sizes. See pic of where I
marked mine.
Make
small loops on each end of your wires.

Using
a ring mandrel or a dowel, curve the wires.
Use
your needle nose pliers to rotate the loops so the holes are facing each other.

To
wrap the hoop, cut 15" of your 24 gauge copper wire. Gather up seed beads
that are all the same size. Whatever will fit through your wire is fine.
On
your 24 gauge wire, make a bend with your round nose at 1/2". Using your
fingers, begin wrapping the skinny wire down the bigger wire. Keep your wraps
straight and tight. Wrap around 5 or 6 times.
Add
one bead, and continue wrapping just like before. You may have to tweak the
bead a bit to get it to lay how you want it to. Really try to get the wire
taught. Wrap around 3 times before adding the next bead.
When
you have reached the other end, finish by wrapping 6 times at the top to match
the other side. Snip your wires and use your needle nose to tuck the wire ends
flush with the coil.

For
the ear wire, cut a piece of 20 gauge at 1.25". File ends. Make a small
loop on one end. Curve it around your dowel.
Make a bend on the other end with
your needle nose, at just under 1/4"
Carefully
open up the loop end to insert into one end of your hoop.

The
last step is patina, and to me, it's where the magic happens. Place your
earrings in a bath of Liver of Sulphur. This can be purchased at jewelry supply
stores, and it is a must have for wire workers.
Let
the earring go to very dark. Remove once it gets dark, don't allow it to sit
there for too long.
Place
a wet finger into your pumice powder and begin to rub off the patina. You want
the patina to stay inside of the wrapped wire, and you want to have a contrast between
clean and dark copper. Remove most of the patina from the ear wire.

Now
that you know the basics, get creative and come up with your own designs, the
possibilities are endless! If you have any questions, feel free to email me at:
laurel@laurelnathanson.com or leave a comment here.
Happy wrapping!

Bellos, me encantan, felicidades
ReplyDeletegracias!!!!!!!! xoxoxoxo
DeleteThere is lead in brass.
ReplyDeleteThere is not always lead in brass, but brass and bronze are now catch-all terms for what was in ancient times a "Copper-tin" alloy, but there are no standards & so now it can have many things added and still be called those names.
DeleteThen it's certainly a good thing there is no brass in these.
ReplyDelete